Setup and configuration#
This topic covers setting up and configuring AssetTracker for your data centers.
Adding rack assemblies#
The first generation of AssetTracker ships with 52RU or 42RU assembly kits which include master modules, extension modules, installation brackets, and asset tags. The master module firmware expects different extension module configurations for different sizes:
The firmware for 52U master modules will always identify the first six modules as 6RU and the last two as 5RU.
The firmware for 42U master modules will always identify all modules as 6RU.
Since rack sizes can vary, please refer to the following table for assembly configuration examples.
Rack Size (RU) |
Assembly Configuration Examples |
|---|---|
42 |
Use 42RU assembly kit |
44 |
Use 42RU assembly kit and mount at 2RU from the top or bottom |
47 |
Use 42RU assembly kit with a 5RU or 6RU extension module. |
48 |
Use 42RU assembly kit with a 6RU extension module. |
51 |
Use 52RU assembly kit and mount at 1RU from the top or bottom |
52 |
Use 52RU assembly kit |
Note
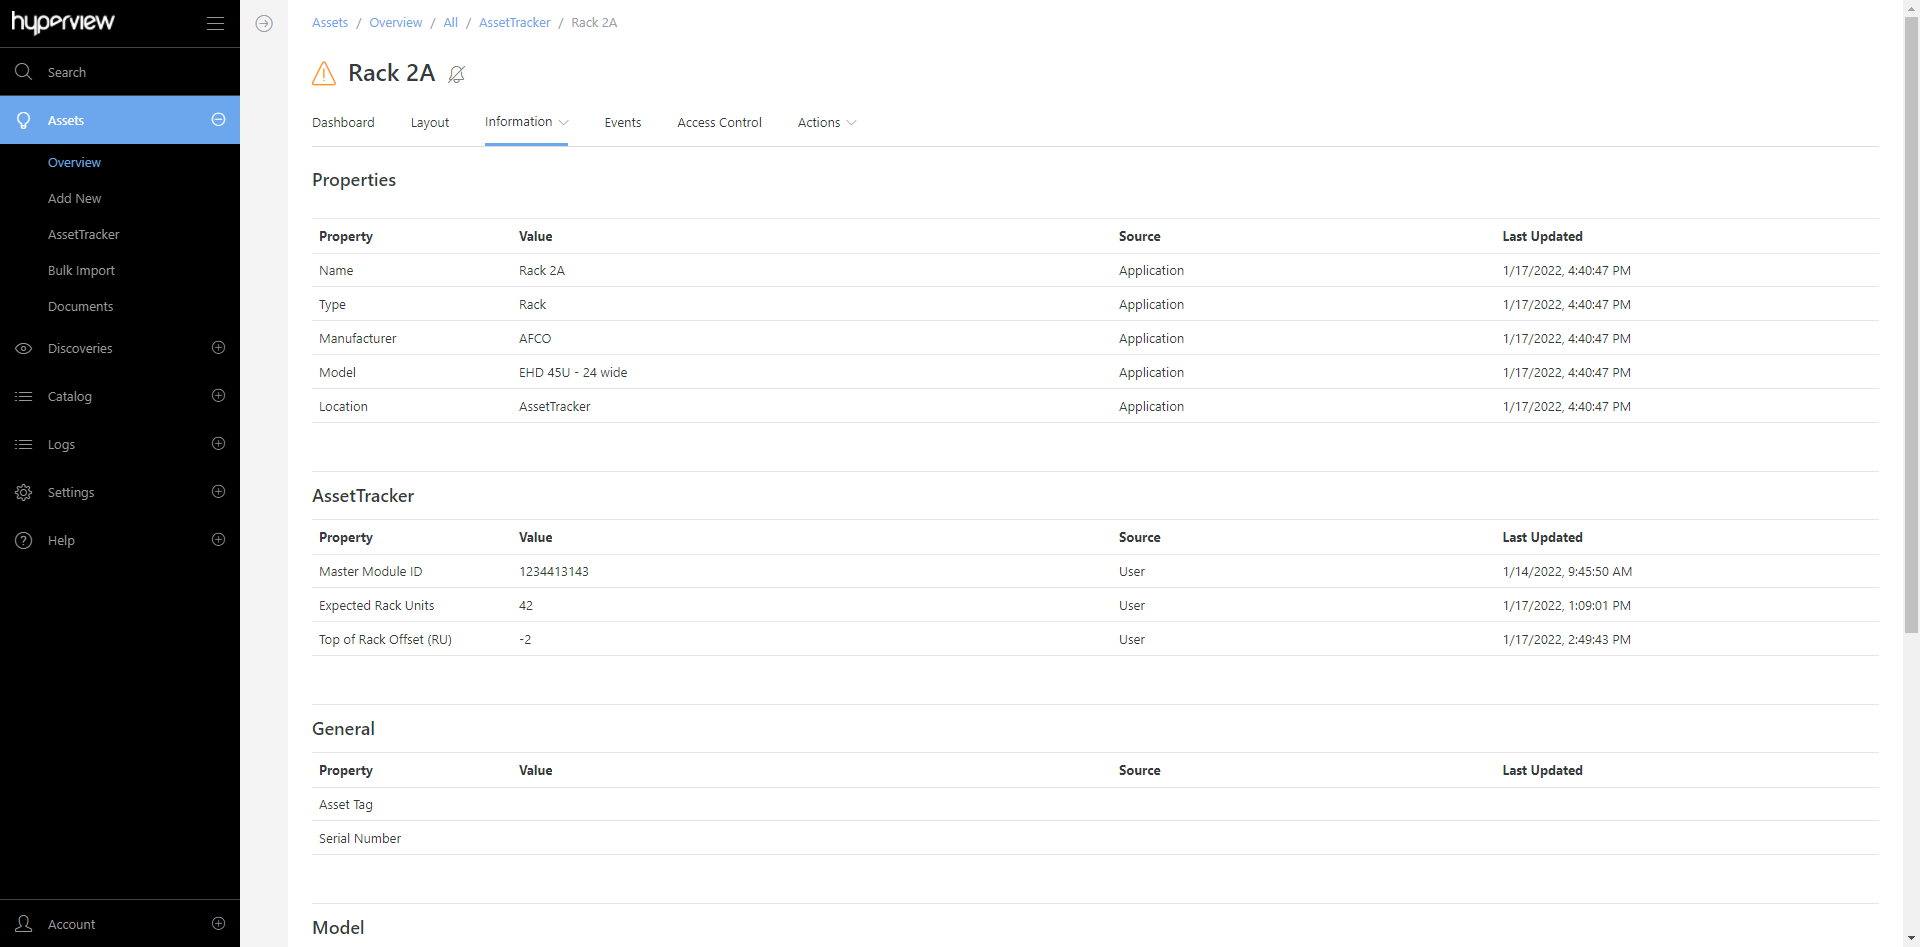
You can use the Expected Rack Units and Top of Rack Offset (RU) fields on the rack’s Properties page (rack → Information → Properties) to fine-tune your setup or accommodate additional assembly configurations and rack sizes, as needed. Please attach master modules and extension modules accordingly.
Rack assemblies must be configured with a tool to point them to an applicable Data Collector.
First-generation Rack Assemblies listen on 502/TCP.
Second-generation Rack Assemblies listen on port 5656/TCP.
The configuration must be done from a Windows machine running the configuration tool. It is recommended, though not required, to be on the same network as the Rack Assemblies.
A copy of the configuration tool will be provided as part of the license activation and onboarding process.
Adding modules#
Note
You must contact our Support team to configure master modules and Data Collectors before you can use first-generation AssetTracker features.
Create or update a rack in Hyperview to correspond to the physical rack that will be tracked.
You can provide the AssetTracker Master Module ID (the serial number of the physical master module) while creating the rack.
If the rack already exists, you can update its properties (rack → Information → Properties) to include the Master Module ID.
The module will appear on the AssetTracker page (Assets → AssetTracker) within a few minutes. Proceed to add asset tags.
Aligning RUs#
Depending on your set-up you may need to explicitly configure rack units. For example, your AssetTracker assembly (master module plus extension) could be smaller than the physical rack, or you might want the RU count to go up to 52U instead of 42U.
To align RUs, open the Properties page (rack → Information → Properties) and provide values as needed.
The Expected Rack Units value should match the RU length of the AssetTracker assembly.
The Top of Rack Offset (RU) value should match the number of RUs you want to offset the top of the rack by. This can be a positive or negative value depending on whether the top of the AssetTracker assembly is below or above the top of the physical asset.
For instance, if the rack has 44 RUs but the AssetTracker assembly is only 42U, set Expected Rack Units to 42. If the AssetTracker assembly is installed from the top of the rack as suggested, leave Top of Rack Offset (RU) blank or set to 0. Alternatively, if the assembly is installed from the bottom of the rack, set Top of Rack Offset (RU) to 2.
Adding and auditing asset tags#
Create or update an asset in Hyperview that corresponds to a device in the target rack.
You can provide the AssetTracker ID (the serial number of the intended asset tag) while creating the asset. Note that the asset tag can be quickly scanned using a compatible barcode or QR code scanner to populate this value.
If the asset already exists, you can update its properties (asset → Information → Properties) to include the AssetTracker ID, or use the Asset Audit page (asset → Information → Asset Audit) to update the AssetTracker ID value.
Place the adhesive part of the asset tag onto the device. Ensure the tag is secure.
Place the tag itself on the rack’s AssetTracker module. You must place the tag on the topmost U-location occupied by the asset being tagged.
For example, if you are tagging a 4-U device placed between locations 20 and 23, place the tag on location 23.
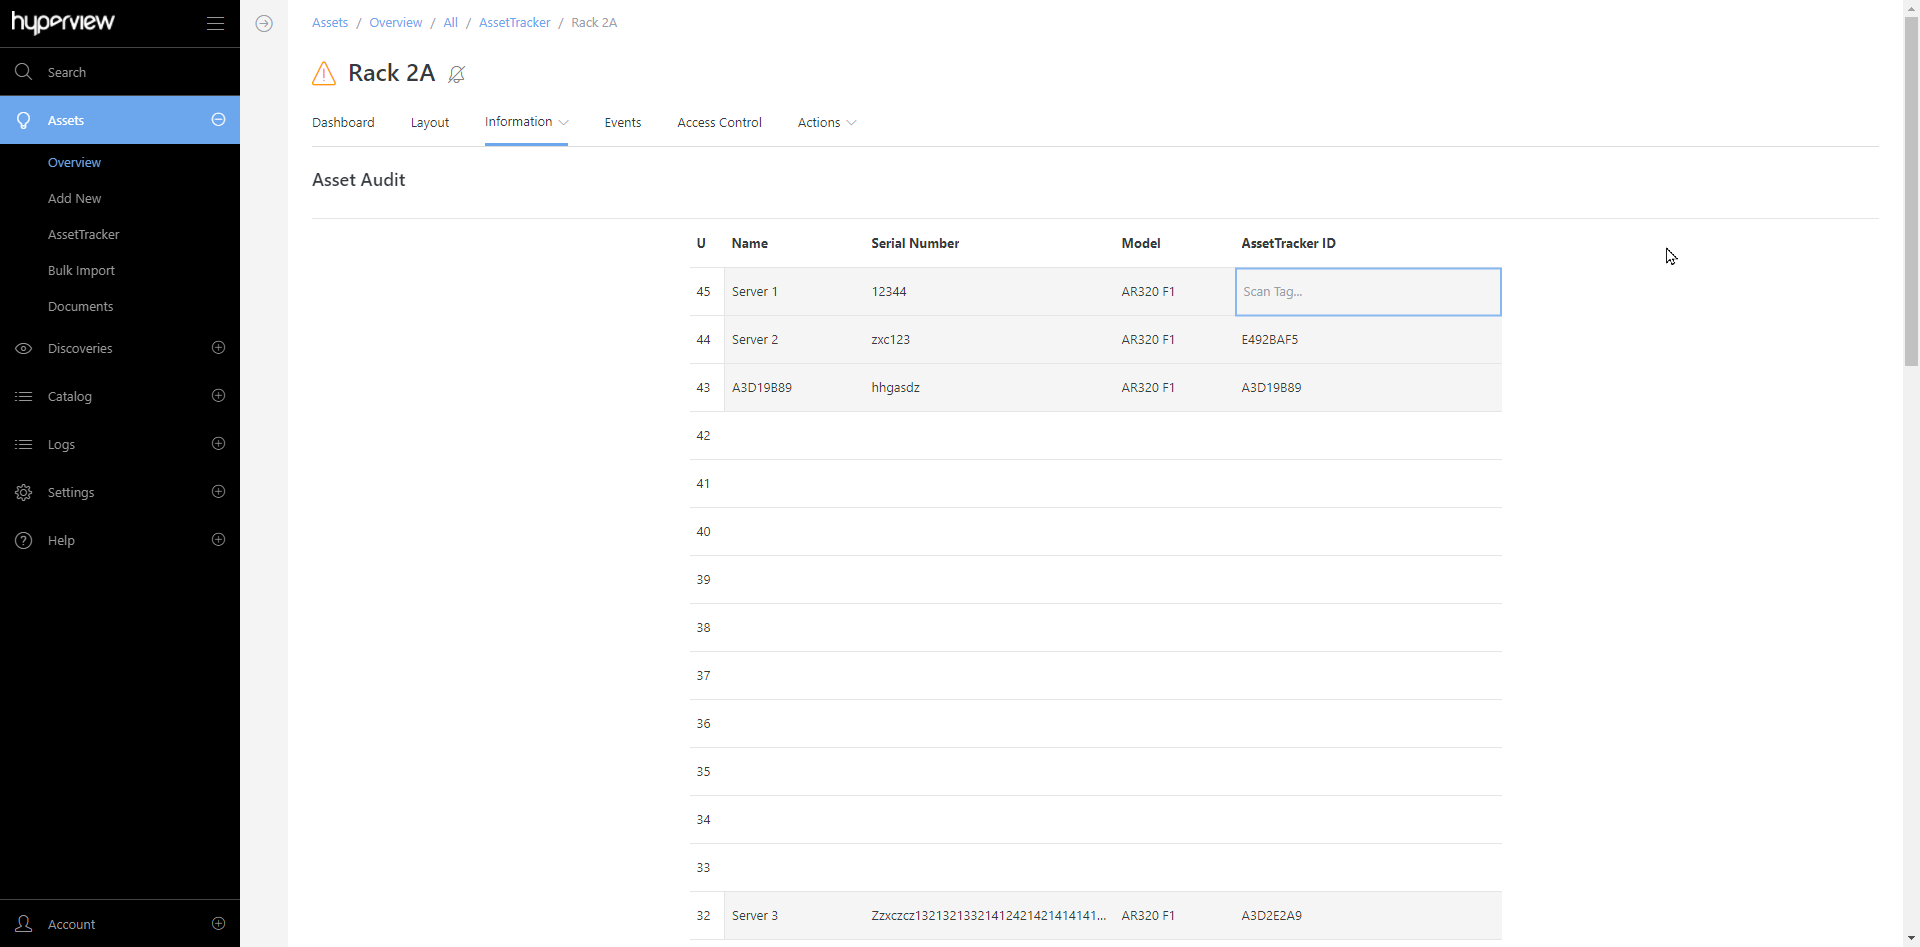
Assuming there are no placement collisions or errors, the asset will be moved to the correct rack U in the Rack Elevation within a few minutes. It will also be shown on the Asset Audit page for the rack (rack → Information → Asset Audit). Proceed to add more asset tags for other racked devices. Please contact Hyperview Support if you need to attach extension modules.
Network requirements#
AssetTracker master modules must be configured to communicate with a Data Collector. Communication is from the module to the Data Collector. The AssetTracker Service listens on TCP Port 4242. The Data Collector setup documentation has more information on the network requirements.