Administering user accounts
Only Administrator users can perform user administration tasks.
Managing domains
A “domain” implies a corporate email domain. Most organizations have one unique domain, but others may have different domains for sub-organizations.
Note
You must add a domain before you can add any users. The primary domain for your organization will be created during the Hyperview onboarding process.
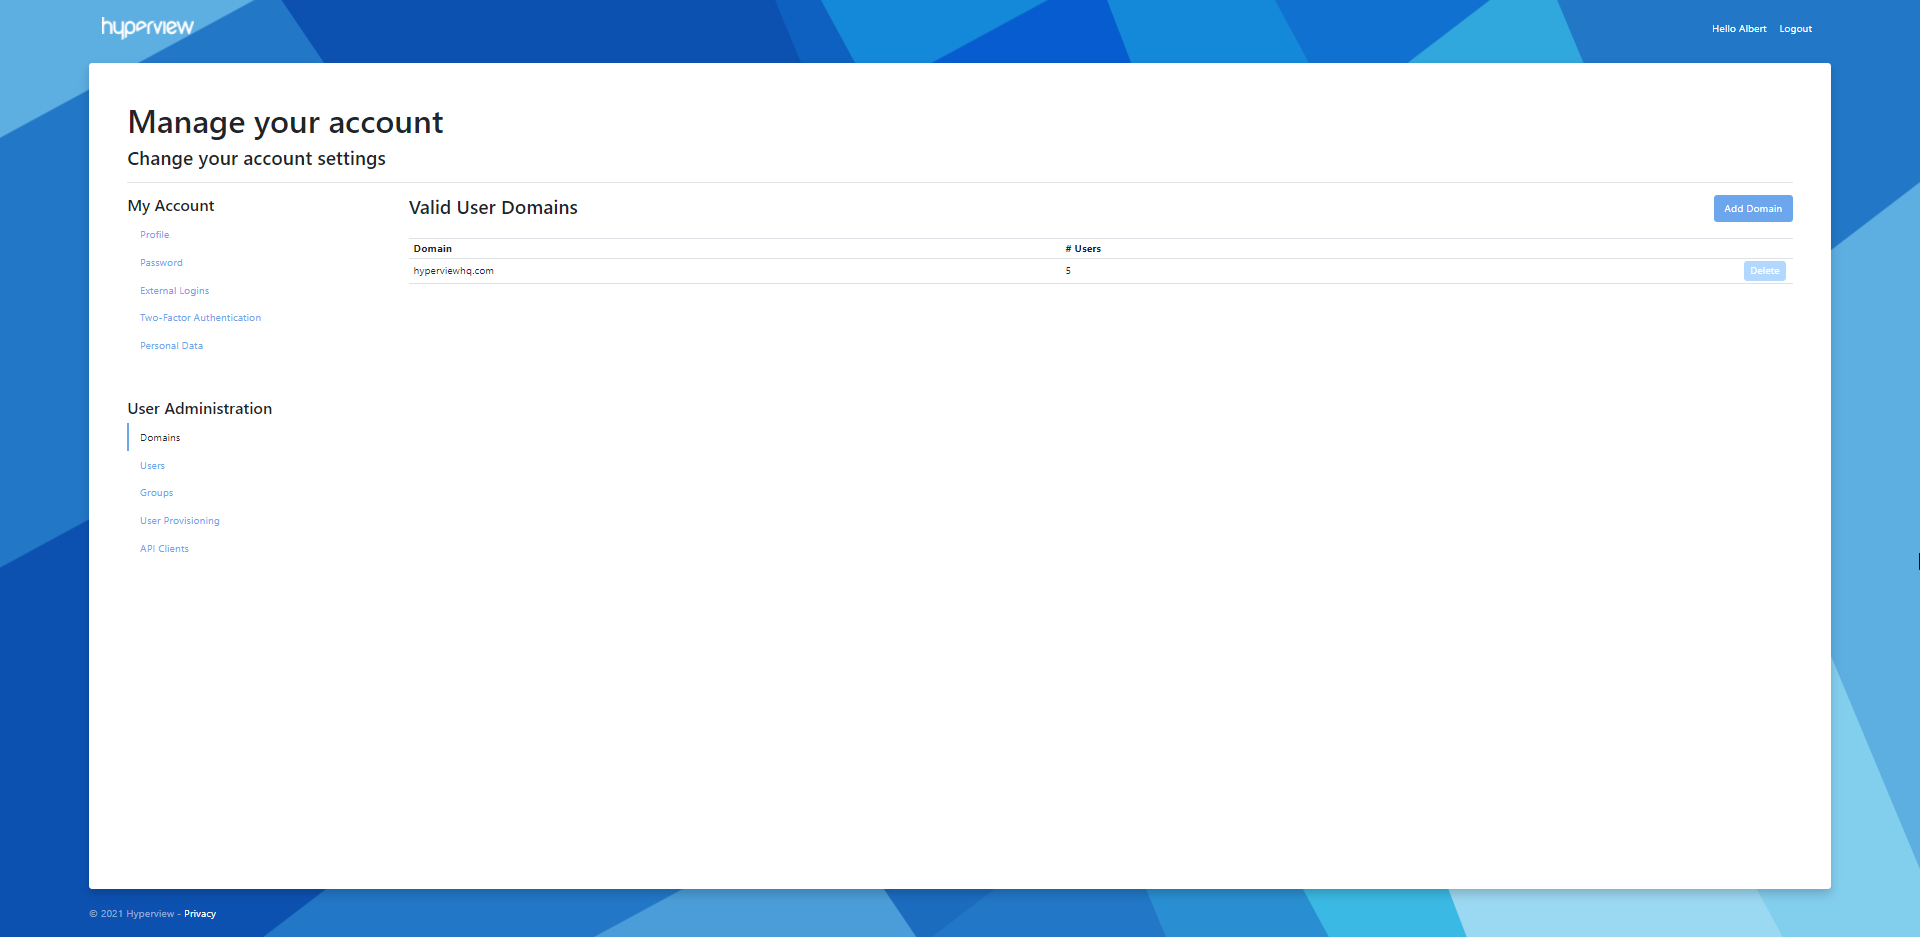
Adding a new domain
1. Go to Domains → Add Domain. 3. Enter a valid corporate domain.
The page will refresh showing a confirmation message and the newly added domain.
Removing a domain
Click the domain’s Remove button.
A confirmation message will appear.
Managing users
A “user”, “account” or “user account” in Hyperview terminology refers to a profile created in the application for a human user. A user’s role determines what application-wide actions the person can or cannot perform; further access restrictions can be applied from the Access Controls page of a given location, rack, or asset.
How many users you will need to create will depend on the number of employees in your organization who will need to access Hyperview. Some organizations prefer only to create a handful of users, while others might require all of their employees to be on the system.
Refer to the “User Roles” section in User Accounts for an overview of Hyperview user roles. For information about user accounts for API clients, refer to the “Managing API Clients” section below.
Adding a user
Go to Users → Add User.
Provide user details. Note that:
You cannot update a user’s email address once the account has been created.
You will need to select a pre-existing domain for the email.
The password must be between 6-100 characters and have at least one uppercase letter, lowercase letter, digit, and symbol.
Assign a role as appropriate.
Select any existing groups that you want the user to belong to.
Click Add.
The page will refresh showing a confirmation message and the newly added user.
Updating a user
Click the corresponding Edit button in the Users grid.
Update details as required and click Save.
A success message will appear, and the user details will be updated in the Users grid.
Enforcing external login
You can force users to log into Hyperview using their configured external login (refer to “Managing external logins” in Managing your user profile). As of Hyperview 1.5, Microsoft is the only supported external login provider.
To enforce external login for a user, turn on the External Login Required toggle in the user grid. Once this is turned on, the user can no longer access Hyperview using a username/password combination.

Note
Enforcing external login will cause the user’s current Hyperview password to expire. If the External Login Required toggle is turned on and then turned off again, a password reset will be required to allow access via a username/password combination.
Locking and unlocking a user
You can lock a user account indefinitely. Locked users cannot access the application regardless of their login method (external login or using Hyperview username/password), authentication method (with or without 2FA), or group associations. You can unlock a user when you want to re-allow access.
To lock an existing user, click the corresponding Lock button.
To unlock a locked user, click the corresponding Unlock button.
A success message will appear, and the Lock/Unlock button for the user will be updated accordingly.
Deleting a user
Click the corresponding Delete button in the Users grid.
Click Delete in the Delete User modal.
A success message will appear and the user will no longer be listed in the system. Deleting a user account will automatically remove it from any associated groups.
Note
Locking or deleting an account is immediate, however, if the user is logged in when the action is performed it can take up to 300 seconds for the action to take effect.
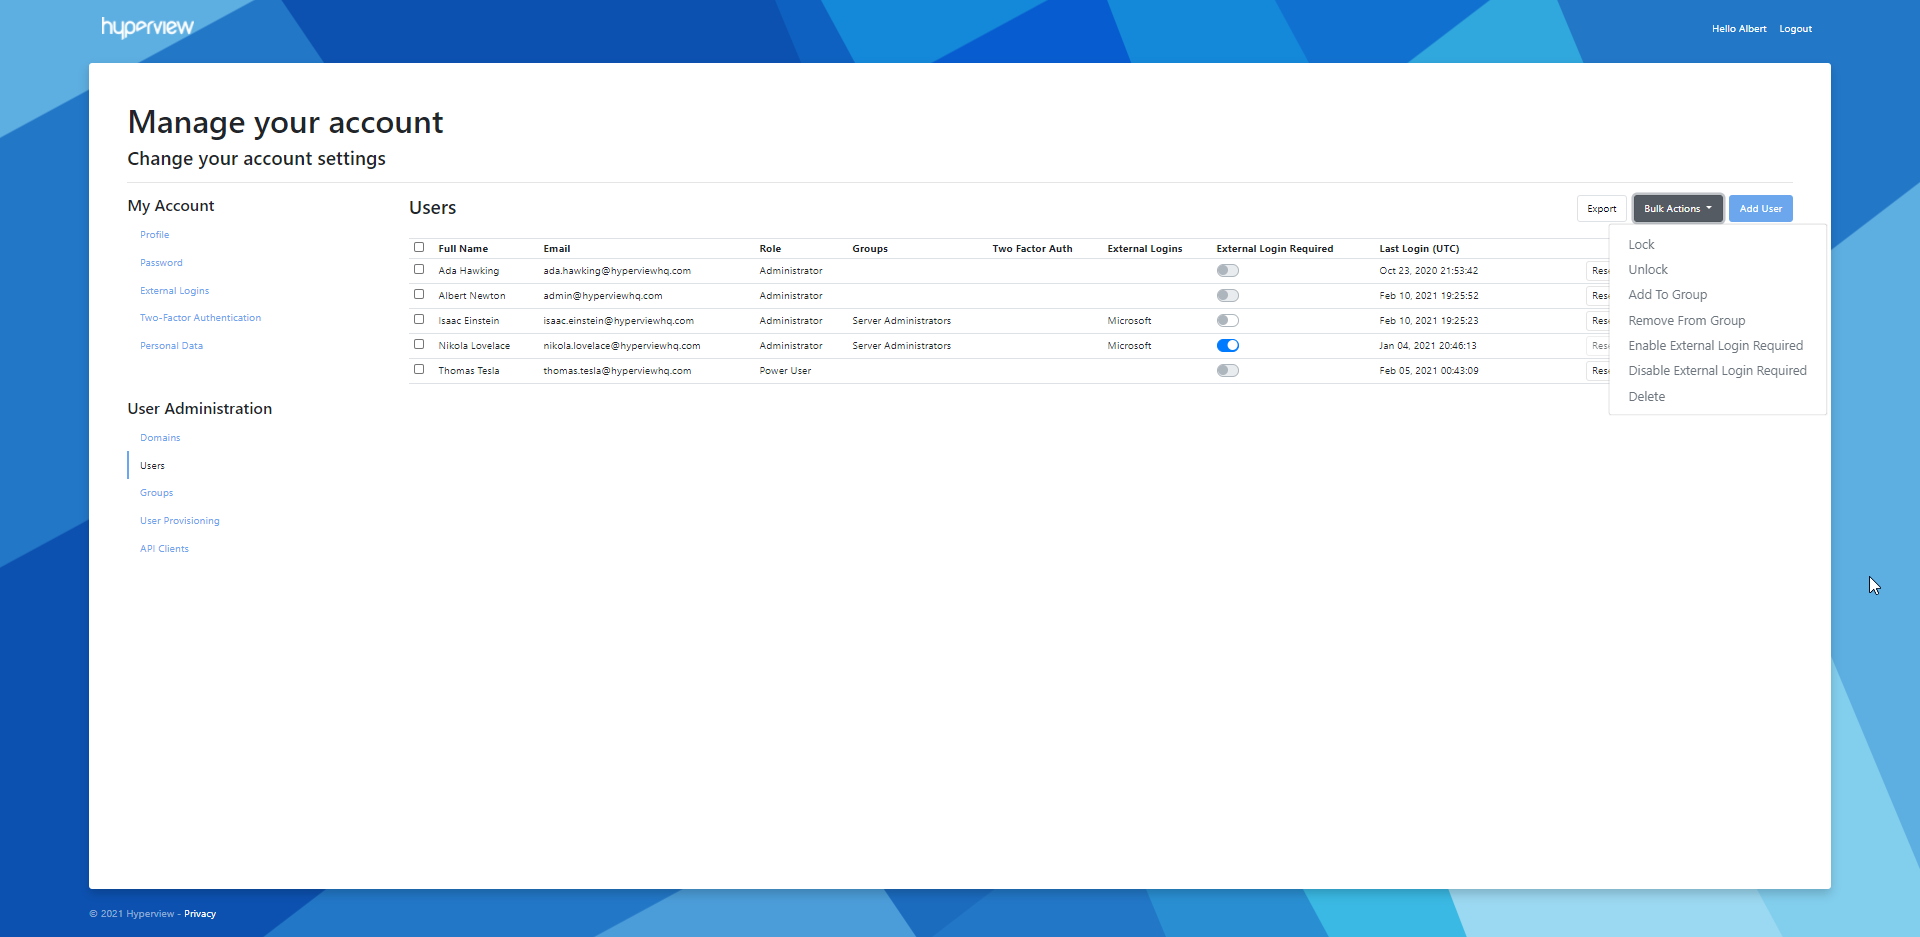
Performing bulk actions
You can perform bulk actions against selected user rows in the Users grid. The following bulk actions can be performed: Lock, Unlock, Add To Group, Remove From Group, Enable External Login Required, Disable External Login Required, Delete.
Note
Any non-applicable contexts, such as the fact that you cannot delete your own user account, will automatically be taken into consideration. For example, if you select and bulk-delete all existing user accounts, the other user accounts will get deleted, but yours will not.
Select the checkboxes for the intended user rows.
Click Bulk Actions, and subsequently click the intended bulk action.
The bulk action will be performed, and the grid will refresh to reflect any changes.
Sending a reset password email
To send a reset password email on behalf of another user, click the corresponding Reset Password in the grid.
A confirmation message will appear, and an auto-generated reset password email will be sent to the user’s email address.
Tip
Users can also send themselves reset password emails from the “Forgot your password?” page (Hyperview Log In page → Forgot your password?).
Note
Resetting a password will have no effect if external login is enforced.
Exporting data
You can click the Export button to export the grid in Excel (.xlsx) format. All grid data across all possible pages will get exported, as per the current column structure, sort order, and filters.
Managing groups
A “group” in Hyperview terminology implies a group of users. The advantage of using groups is that you can associate groups with access policies (from Settings → Access Policies), which makes it a lot easier to configure asset-level access across a large number of people.

Adding a new group
Go to Groups → Add Group.
Provide a Name and Description, then click Add.
A success message will appear, and the new group will be listed in the Groups grid.
Updating a group
Click the corresponding Edit button in the Groups grid.
Update details as required and click Save.
A success message will appear, and the group details will be updated in the Groups grid.
Deleting a group
You cannot delete groups that have associated users. As of Hyperview 1.5, you must first update each associated user account to remove the group association (refer to “Updating a user” above). After that:
Click the corresponding Delete button in the Groups grid.
Click Delete in the Delete Group modal.
A success message will appear, and the group will no longer be listed in the Groups grid.
User provisioning with Azure AD
You can auto-provision user accounts for Azure Active Directory domains that are mapped to specific user roles and groups. For example, you can create an Azure AD domain for Data Center Managers who are spread across groups called “DCM 1”, “DCM 2”, and “DCM 3” groups. Corresponding users will be auto-provisioned upon logging into Hyperview with their Microsoft login; you do not need to manually create user accounts for them.
Unprovisioned users who do not belong to a configured Azure AD domain will get an “Access Denied” error upon trying to log in with their external login credentials.
Note
The Azure AD domain must be a login domain (not an alias). For associated user accounts, the username must be the primary email account/username for the user and have the same domain as the intended Azure AD domain.
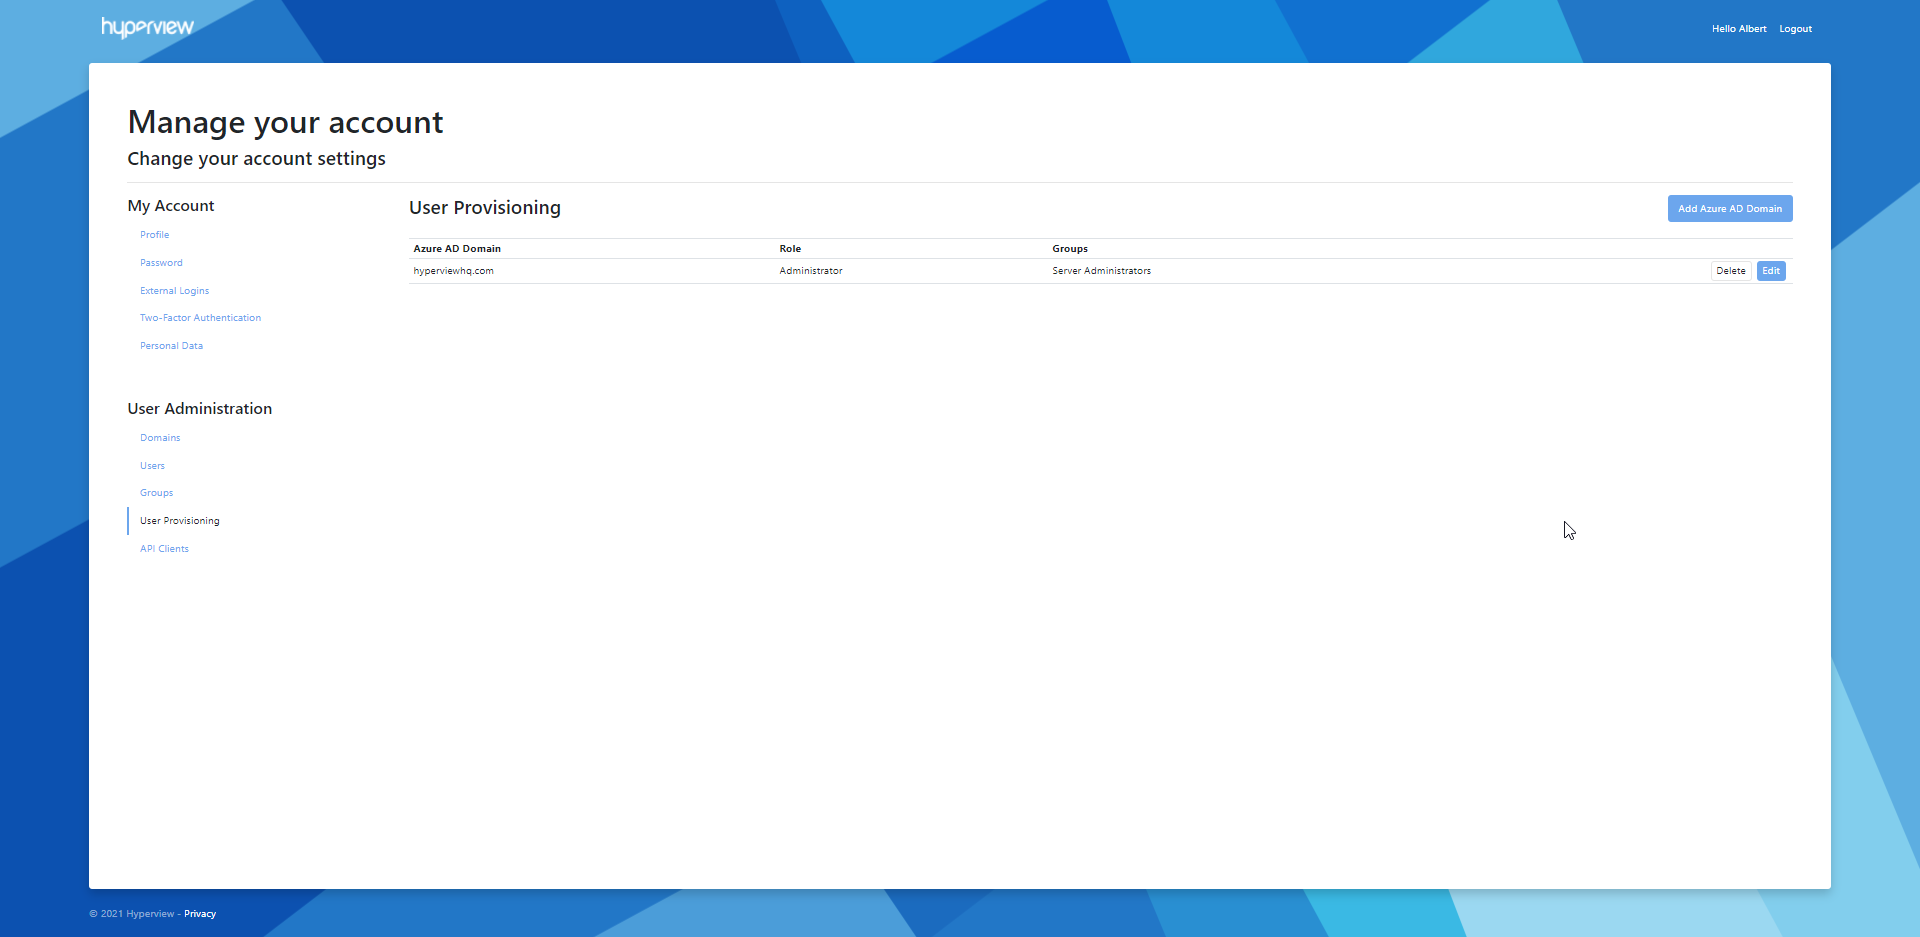
Adding an Azure AD domain
Go to User Provisioning → Add Azure AD Domain.
Provide the Azure AD domain name (which should correspond to your corporate domain). Also specify the default user role and any default (optional) user groups for auto-provisioned users.
Click Add.
A success message will appear, and the Azure AD domain will be listed in the User Provisioning grid.
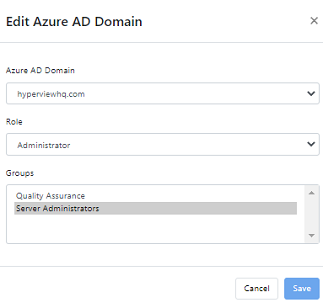
Updating an Azure AD domain
Click the corresponding Edit button in the User Provisioning grid.
Update details as required and click Save.
A success message will appear, and the domain details will be updated in the User Provisioning grid.
Deleting an Azure AD domain
Click the corresponding Delete button in the User Provisioning grid.
Click Delete in the Delete Azure AD Domain modal.
A success message will appear, and the domain will no longer be listed in the User Provisioning grid.
Managing API clients
You can create user accounts for API clients, which let you programmatically integrate with Hyperview’s RESTful APIs.
Adding an API client account
In the user management portal, under User Administration click API Clients → Add API Client.
Provide values for Description, Role, and Access Policies. If you are unsure of which access policy to use for the API client, select Default.
Click Add and Download Credentials. A “client_credential.json” will be downloaded to your browser’s default download location. A confirmation message will appear in Hyperview, and the API client will be listed.
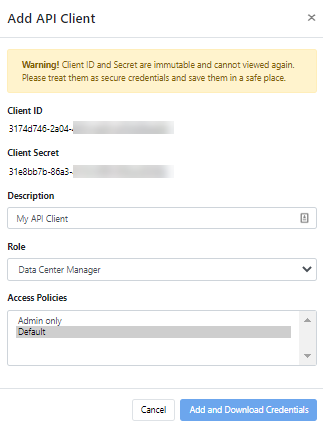
Note
Please treat your API client credentials as you would for a human user, and store them in a safe place. The Client ID and Secret values cannot be modified after the API client has been created.
Deleting an API client account
Click the Delete button on the intended row.
A confirmation message will appear.