Adding assets
Assets are typically bulk-imported or discovered. You can also add assets manually, one at a time.
Power Users and above can bulk import and manually add assets. Certain asset types can only be added using a particular method:
Power Meter and Unknown asset types are discovery-only.
Location and Rack asset types can only be added manually.
This topic covers bulk importing and manually adding assets. For a complete list of asset types, see Supported asset types. To discover assets, refer to Discoveries and related topics.
Bulk importing assets
You can bulk import assets using a CSV template that you can download from the application.
Note
You cannot bulk import Location or Rack type assets.
Go to Assets → Import → Download Template File → Assets. A CSV template for bulk importing assets will be downloaded to your browser’s default download directory. Rename and move the file to a different folder as needed.
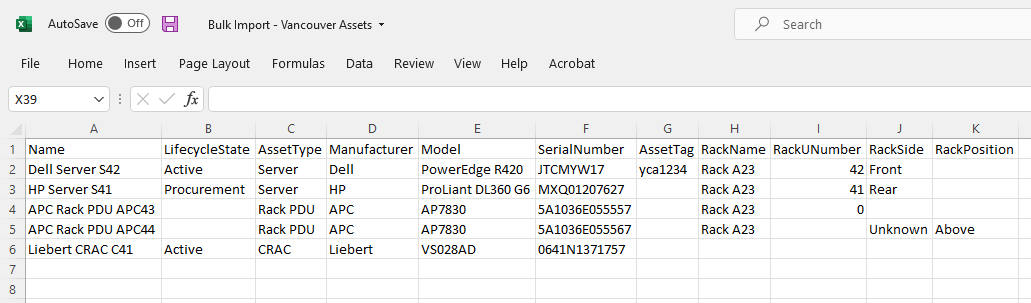
Update the file for assets that you wish to import. Available columns are:
Column |
Name |
Requirement |
|---|---|---|
Name |
The name of the asset you are importing |
Required |
LifecycleState |
The asset lifecycle state (Active, Planned, Procurement, Staging, or Retired) |
Optional |
AssetType |
The asset type, such as Server, PDU, etc. (but not Rack or Location) |
Required |
Manufacturer |
The asset manufacturer name |
Required |
Model |
The asset model name |
Required |
SerialNumber |
The asset serial number |
Required (optional for Rack) |
RackName |
The name of the rack where the asset will be placed |
Optional (only allowed for rackable assets) |
RackUNumber |
The rack unit where the asset will be placed |
Optional (only relevant for non-Zero U assets) |
RackSide |
The rack side (Front, Rear, or Unknown) where the asset will be placed |
Required for 0+ U assets (not allowed for unplaced rackable assets) |
RackPosition |
The rack position (Left, Right, Top, Bottom, Above, Below, or Unknown) where the asset will be placed |
Required for 0+ U assets (not allowed for unplaced rackable assets) |
Save the updated file.
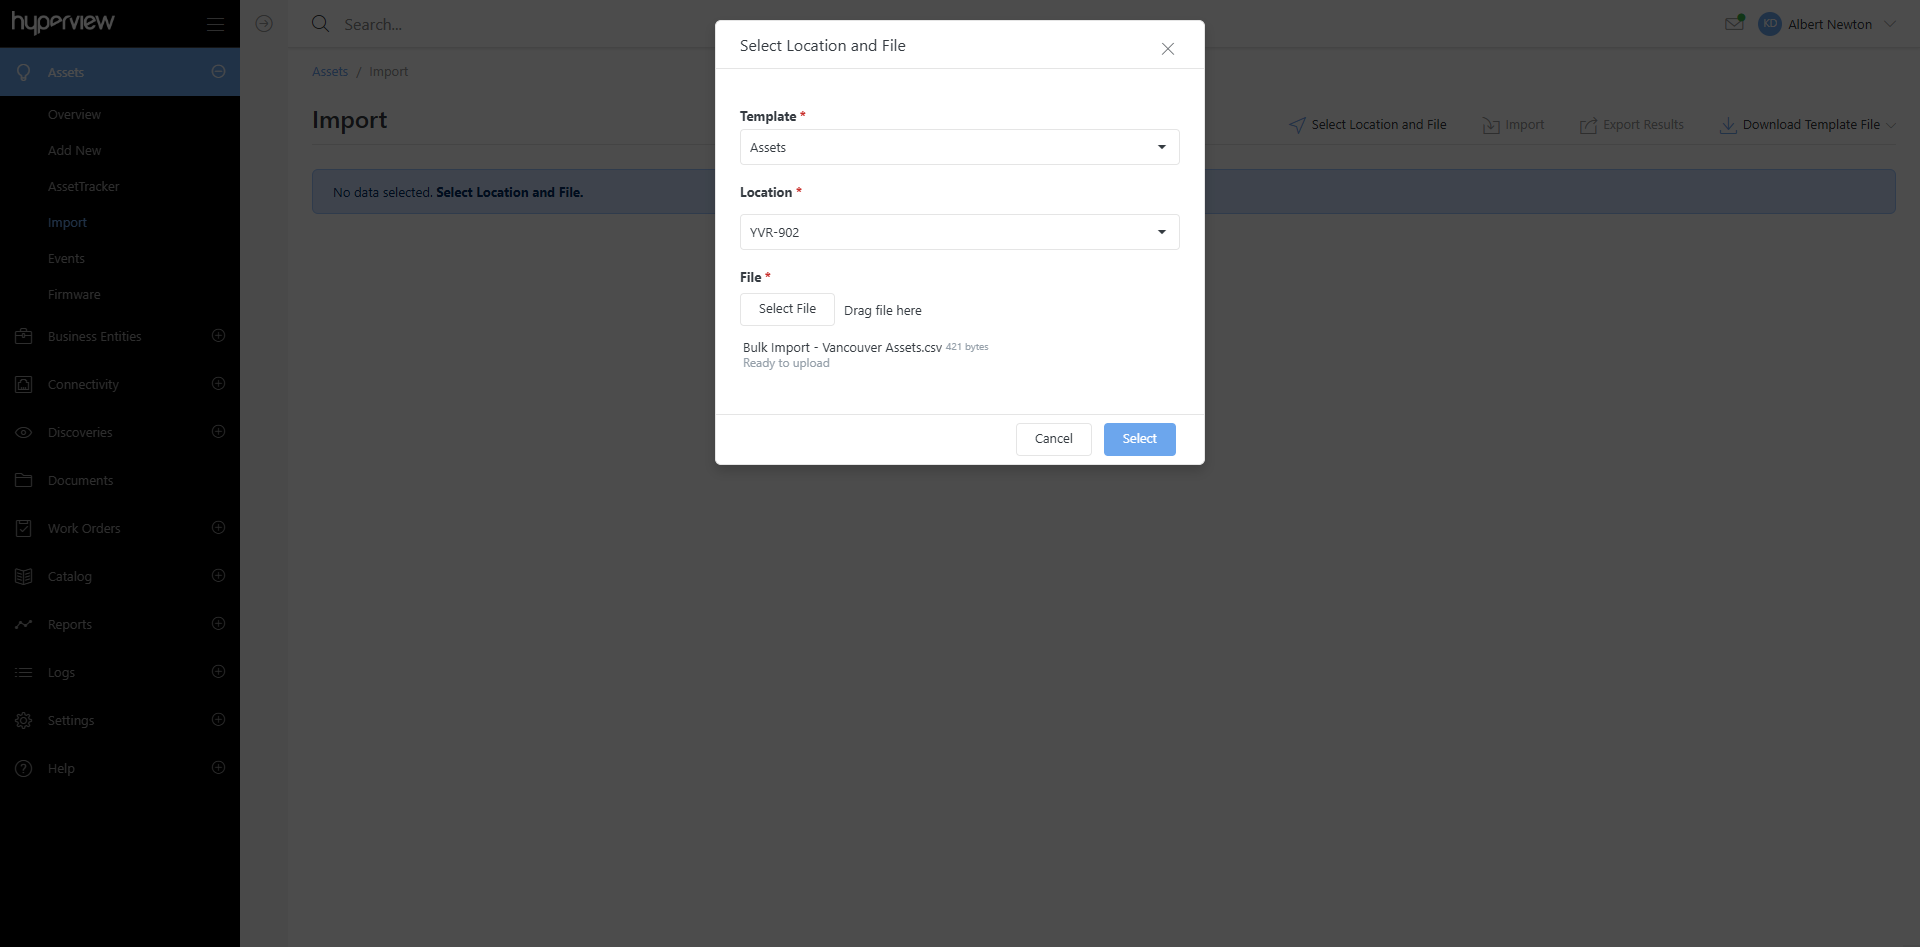
Click Select Location and File. Provide values as follows:
Select the “Assets” template.
Select the target location for the assets. The default location is All.
Select or drag the updated CSV file to upload.
Once the file is uploaded, verify the list of assets. Troubleshoot, update, and re-upload the file as needed.
Click Import.
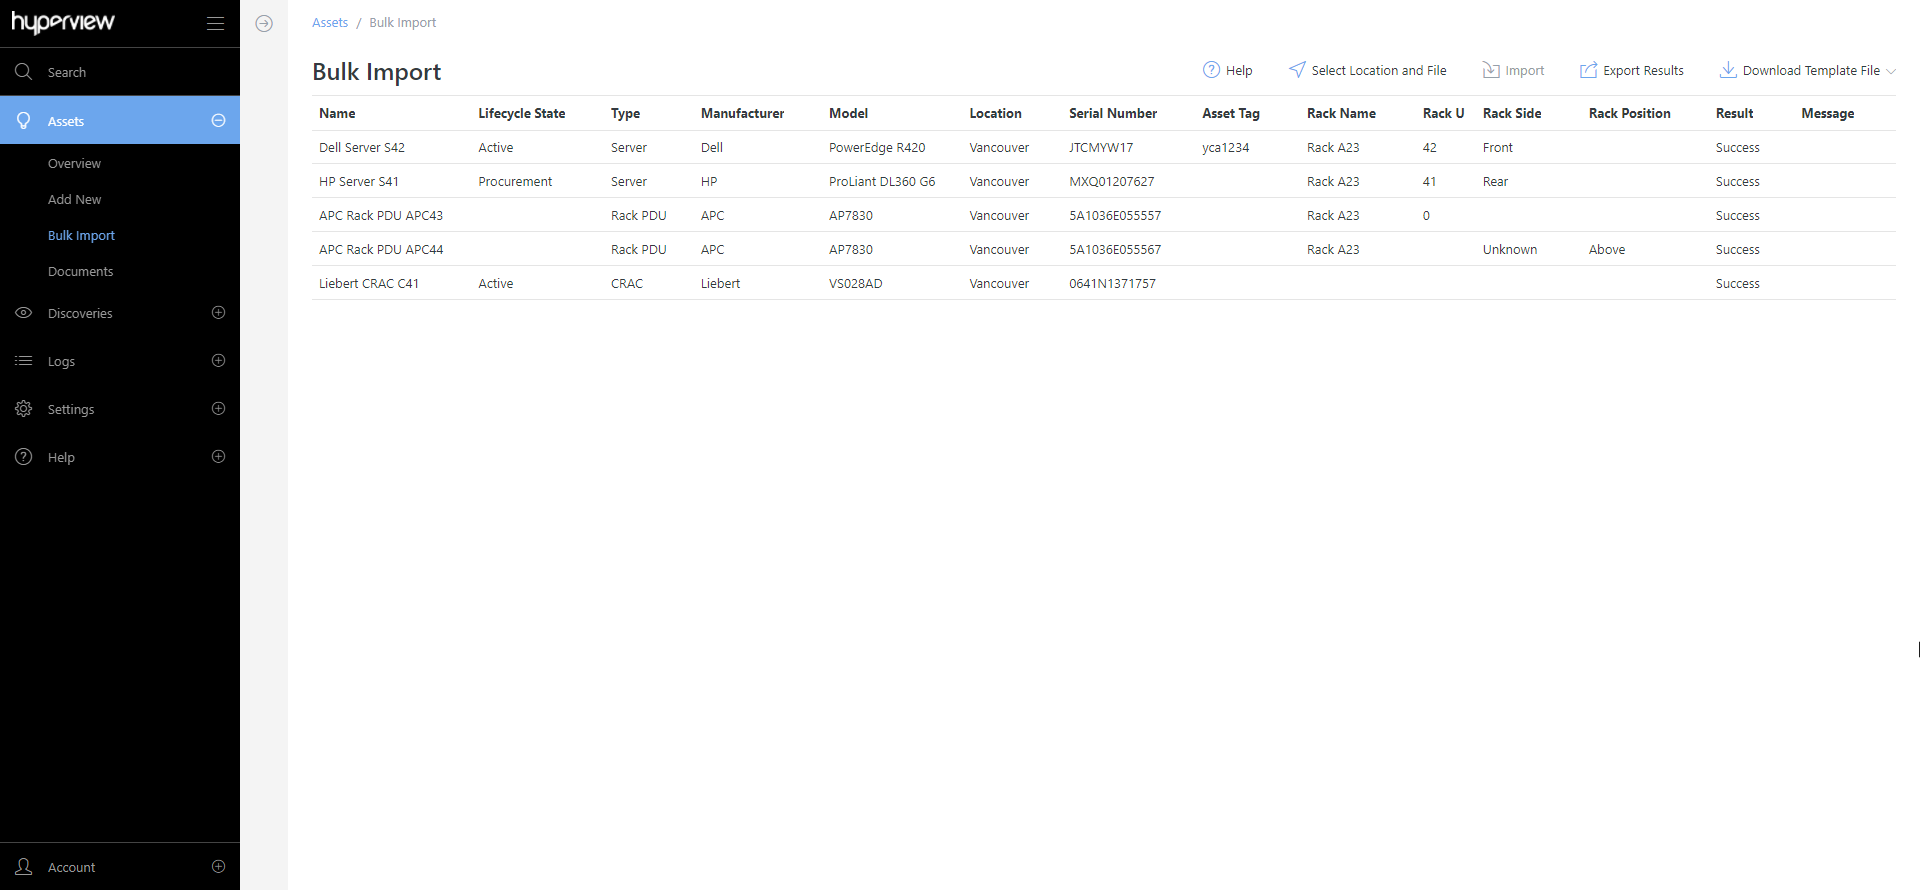
The import process may take several minutes or more if you are importing a large number of assets. Upon import, the assets will appear in the Asset Hierarchy under your specified location.
Bulk import error handling
The Bulk Asset Import process uses the spreadsheet to match the assets to their model data stored in the catalog. The fields require exact matches to validate which manufacturer, model, type, rack, and physical location the assets should be created in.
AssetType is not supported
This error occurs when the Type field does not match an existing known Asset Type in the Hyperview catalog. The list of common Asset Types is as follows.
BladeEnclosure
BladeNetwork
BladeServer
BladeStorage
Busway
Camera
Chiller
Crac
Crah
DcRectifier
Environmental
FireControlPanel
Generator
InRowCooling
KvmSwitch
Location
Monitor
NetworkDevice
NetworkStorage
NodeServer
OtherDevice
PatchPanel
PduAndRpp
PowerMeter
Rack
RackPdu
Server
SmallUps
TransferSwitch
Ups
UtilityBreaker
VirtualServer
RackUNumber must be a number or empty
The Rack U value must be a number and not a range. Hyperview measures the physical asset placement from the topmost RU of an asset, and the physical height of the asset (RU Height) is documented in the product catalog for that asset’s model. For example, a 2U asset that is placed at Rack U 20 will occupy Units 19 and 20. Hyperview Rack U numbers start at 1 from the bottom of the rack.
Failed to validate model, manufacturer or rack name
This error occurs when the model, manufacturer, or rack name value does not match any existing model value in the product catalog. This typically means that the model does not exist in the catalog yet, but could also be due to a typo in the model name or that the model name differs slightly between the input data and the catalog data. The import process uses an exact match with the provided data against the catalog to identify the product models.
Users have two methods of adding unsupported models to the Catalog, as the bulk import process does not create model data for you.
Navigate to the Catalog > Manufacturers and Catalog > Models page in your Hyperview instance, then create the new model and add product specifications. A new manufacturer can also be added if there is a need.
Generate and send the list of product models to the Hyperview support team via a help desk ticket and we can help to add and sync the models to your instance.
Model is required
This occurs when the Model field for an asset is left empty. A model value is required to import an asset.
Rack name must exist
This occurs when the Rack Name value does not match an existing rack in the location which you are importing assets into. Before the bulk import process can be run the racks must exist in the desired location in Hyperview.
Rack side must be valid
This error occurs when the Rack Side value does not match a known rack side in the platform. The accepted values are “Front” or “Rear”. It can also be “Unknown” or Empty if the imported asset is Zero-U.
Serial Number is required
There are two primary rules for assets in Hyperview. An asset must have a name and the name must not be a duplicate within the designated location, and an asset must have a unique serial number which is not duplicate within the whole environment. In the case of assets which do not have physical serial numbers, it is recommended to use a placeholder value, for example, HV-PHSN-000-0001. Using a predictable pattern for the placeholder serial numbers makes it easy to search for and report on these assets if there is a need.
Manually adding an asset
You can manually add an asset in Hyperview from one of the following places:
The Add New page (Assets → Add New)
The Asset Hierarchy context menu (right-click → Add New Asset or Add New Location)
Asset dashboards (asset → Actions → Add New)
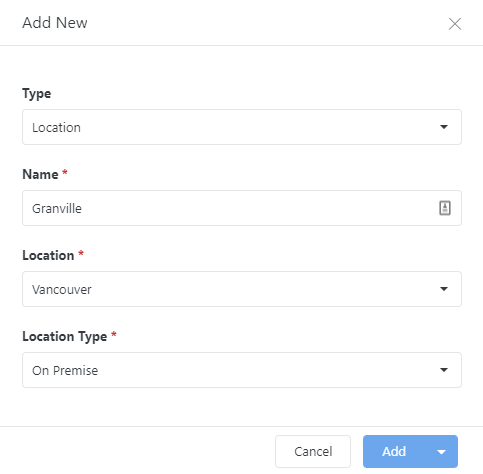
Adding an asset from the Add New page
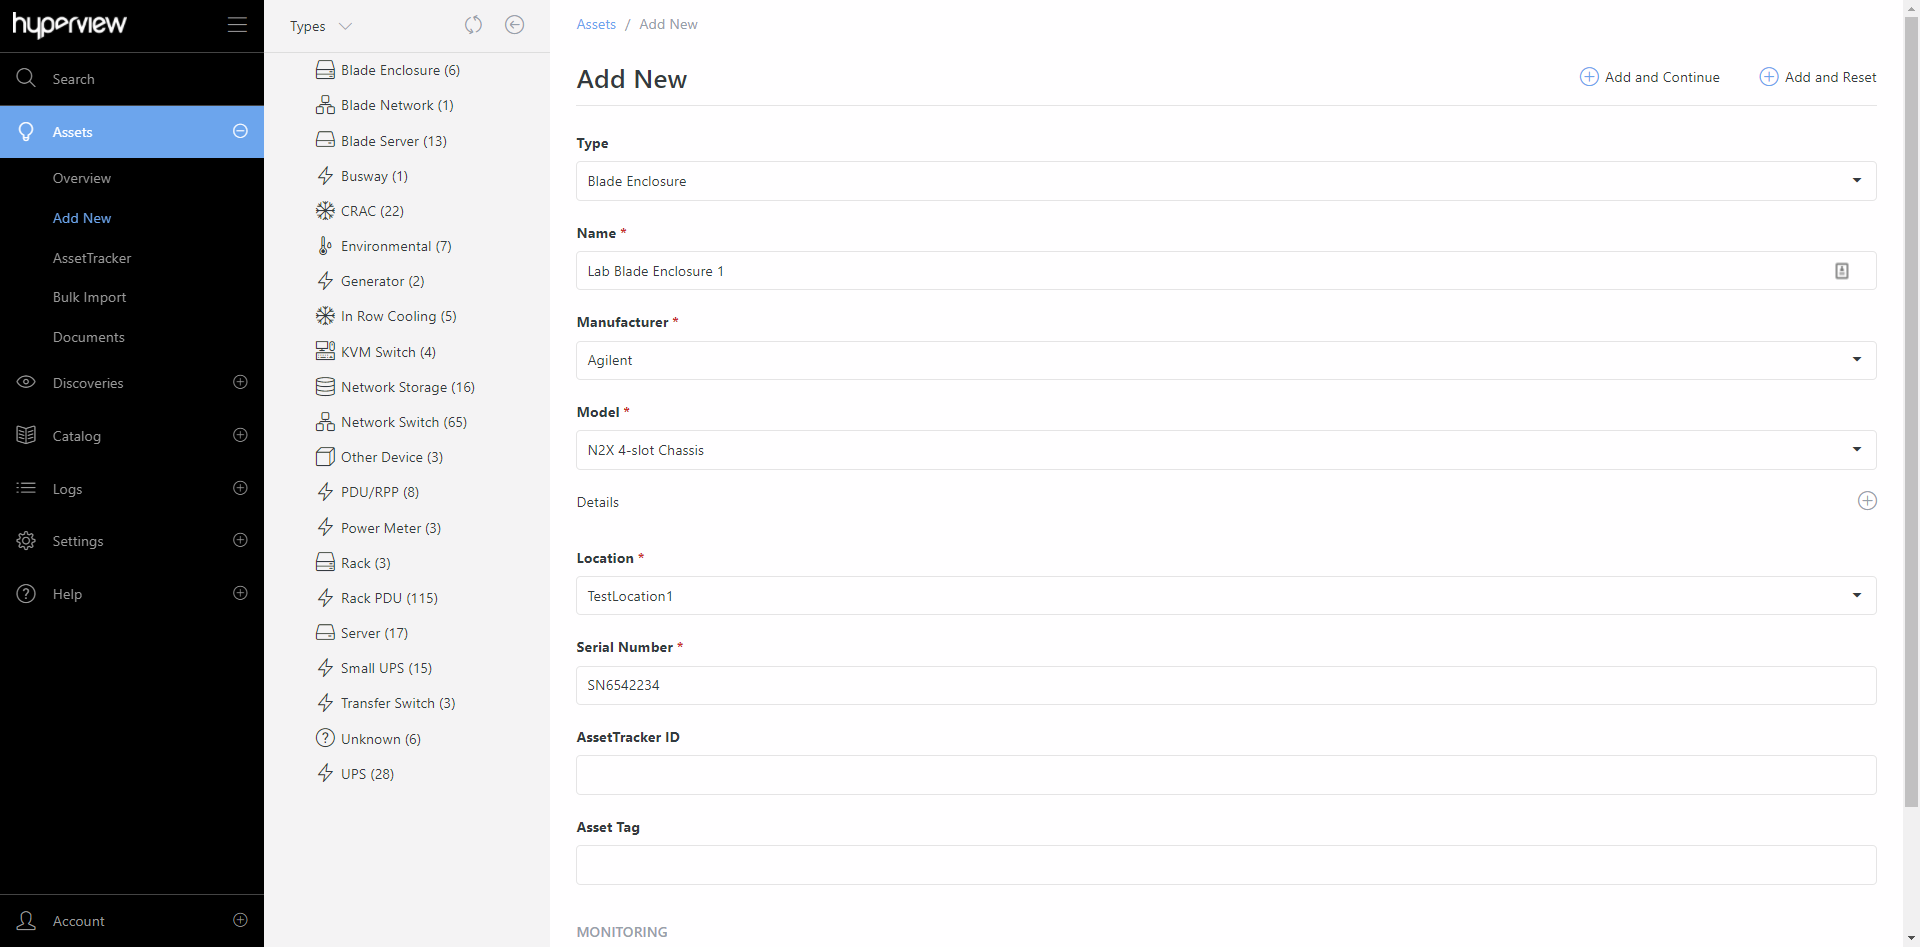
Go to Assets → Add New.
Select a Type. Relevant fields will appear.
Note
Available asset types will depend on the parent asset. The asset type in turn primarily dictates what fields are surfaced.
Enter values as appropriate. Depending on your inputs additional fields may appear.
Note
While selecting a rack, Rack Side and Rack U are required for rackable assets. For Zero U assets, Rack Side and Rack Position are required.
Tip
Create a Data Collector before adding an asset with a BACnet/IP or Modbus TCP sensor monitoring profile. See Prerequisites for instructions.
Click Add and Continue to start with blank fields for subsequent entries, or Add and Reset to repeat your entered values (except for Name) for subsequent entries.
A success message will be shown. The asset will appear in the Asset Hierarchy under the specified location.
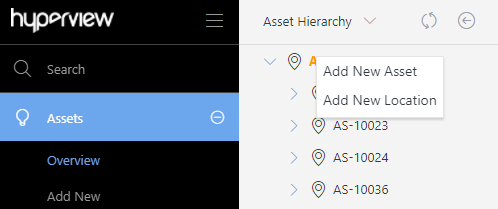
Adding an asset from the Asset Hierarchy context menu
You can add a location or non-location asset directly from the Asset Hierarchy’s right-click context menu. Simply right-click the intended parent location or asset, and select Add New Asset or Add New Location as appropriate.
The rest of the process is identical to what’s described in the previous subsection, with one addition: in step 4, you can also click Add → Add to finish adding the asset (without having to continue with new or same values).
Adding an asset from another asset’s dashboard
You can also add child assets directly from the parent asset record:
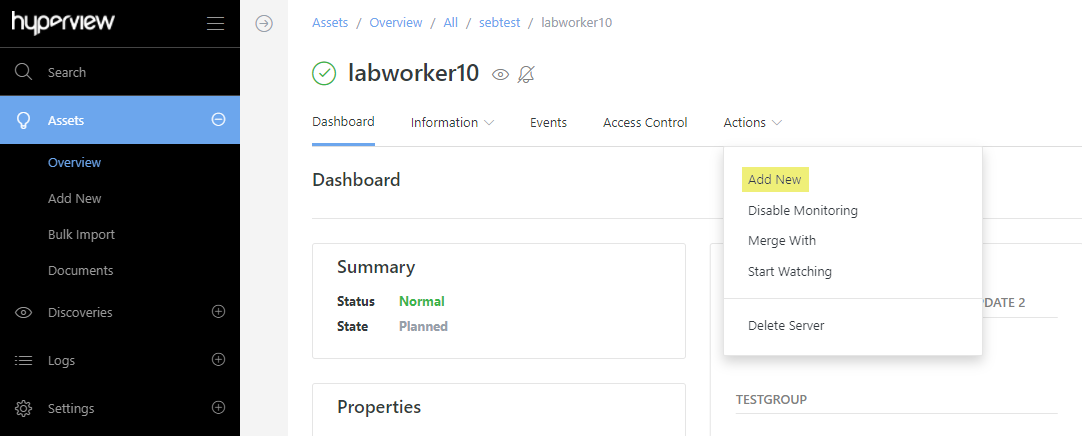
From the parent asset’s Dashboard, click Actions → Add New. Proceed to add an asset as you would from the Asset Hierarchy.